


My latest course, The Art of Masking, is on Presale! Save Big before it’s released.
Even in non-ideal lighting – from blinding mid-day sun to gloomy overcast skies or cluttered venues – many argue that bad light does not exist. The best photographers don’t pack up at noon or avoid shooting in less-than-perfect settings; instead, they adapt. Here’s how to make the most of challenging lighting situations with some expert-backed tips and gear tricks.
Midday Sun (Overhead and Harsh)
When the sun is high and harsh, don’t shy away – adjust. Midday light creates strong shadows and highlights, but you can tame it:
Find or Create Shade: Move your subject into open shade (under a tree or awning) or create your own with a diffuser panel. A simple scrim (translucent fabric on a frame) held overhead softens that direct blast of light into a gentler glow. No shade at all? Have your subject turn their back to the sun so their face falls in their own shadow – this backlighting avoids squints and “raccoon eyes” while giving a lovely rim-light halo. Wedding photographers even mimic golden hour at noon by facing subjects toward their shadows and letting the sun backlight them for a warm rim light.
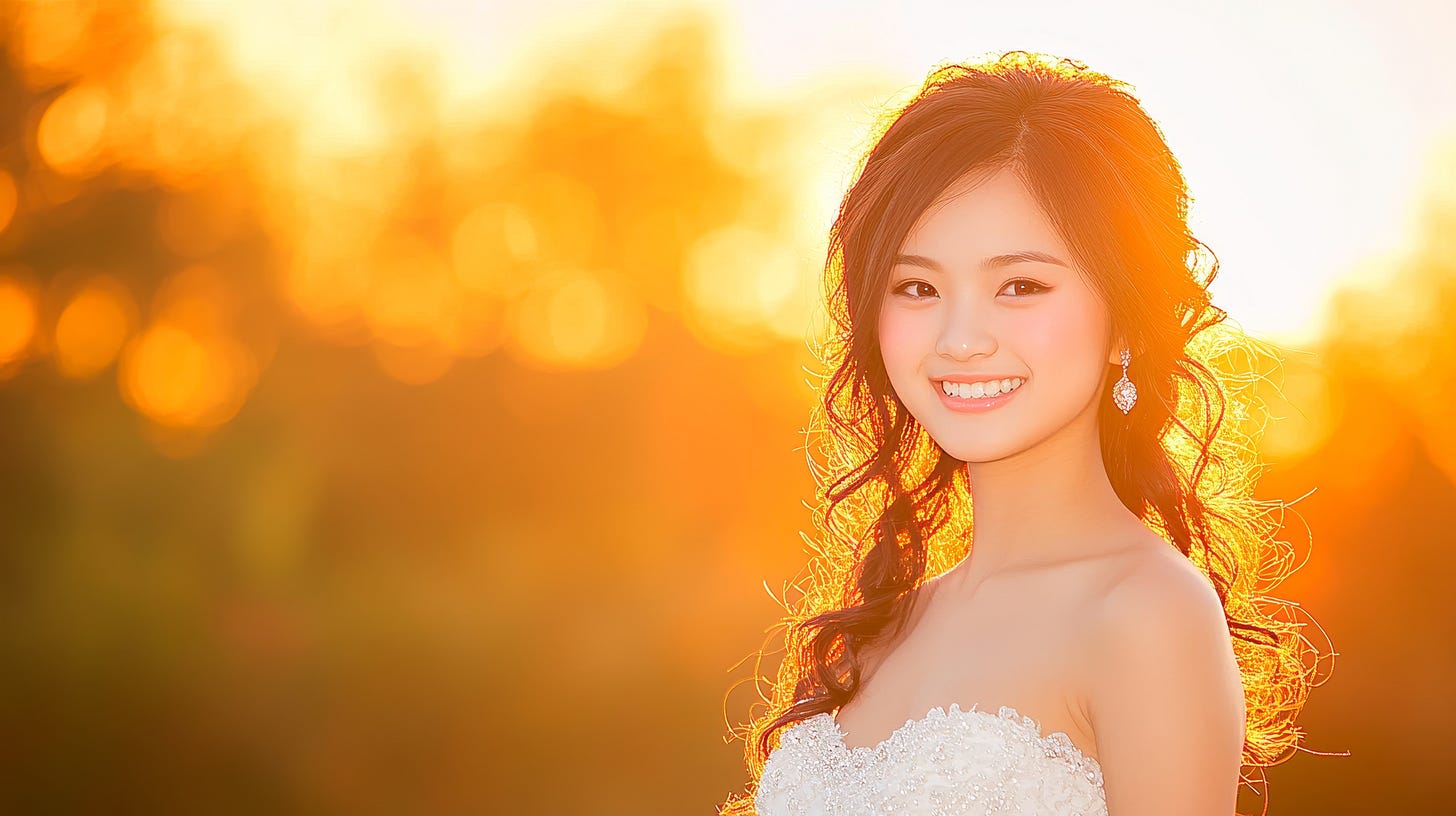
Adobe Stock Image Use Fill Light: Harsh sun from above means deep shadows (think dark eye sockets and under-chin areas). Fill those in. Reflectors are an easy fix – flip open a 5-in-1 reflector (the white or silver side) and bounce sunlight back up into the subject’s face. This fills shadows and adds a catchlight in the eyes, instantly making midday portraits look more balanced. If you have a flash, try using it in high-speed sync or with an ND filter (more on that next) to pop a bit of fill light. Even a small off-camera strobe at low power can illuminate your subject enough to soften the sun’s contrast. The goal is to even out the exposure between the bright background and your subject.

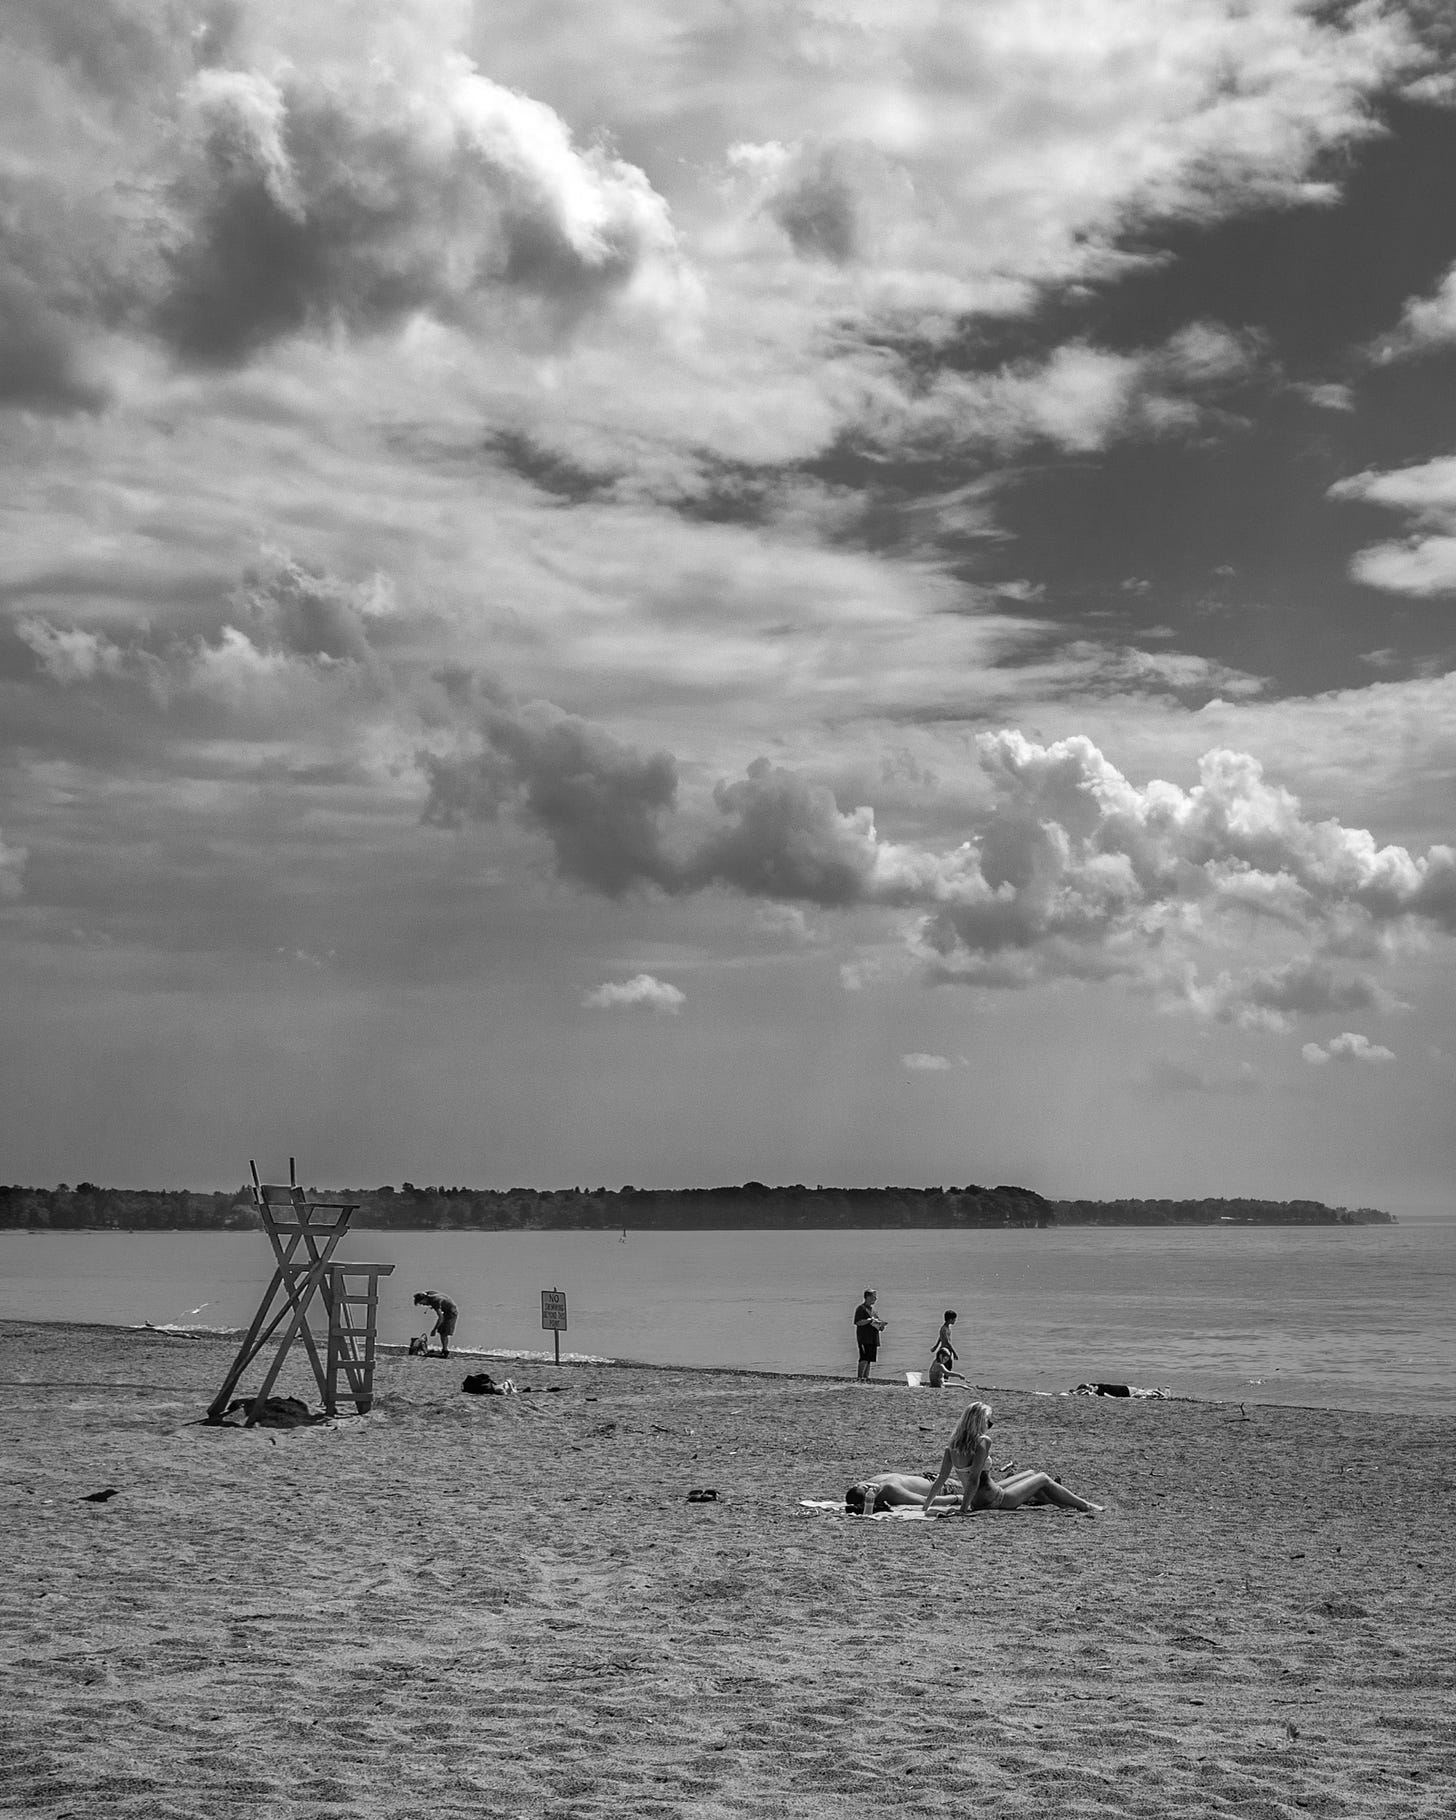
Fill Light — ©Anthony Morganti Filter and Adjust: Certain gear is a lifesaver at noon. A circular polarizer filter cuts down harsh glare and deepens blue skies. When shooting some landscapes and when photographing on a beach, I consider it to be indispensable for midday shoots. It also boosts color saturation by filtering out haze. Likewise, carrying a moderate ND (neutral-density) filter lets you control exposure in bright sun. By darkening the scene, an ND filter allows wider apertures (for shallow depth of field even at noon) or slower shutter speeds (for creative motion blur of clouds or waterfalls) without overexposure. Essentially, it “muzzles” the ambient light, giving you more flexibility. For example, instead of being stuck at f/16, you could put a 3-stop ND on your lens and shoot at f/5.6 in the same light. At times, I’ll stack these tricks – I’ll use a polarizer to cut reflections and an ND to keep settings in check.
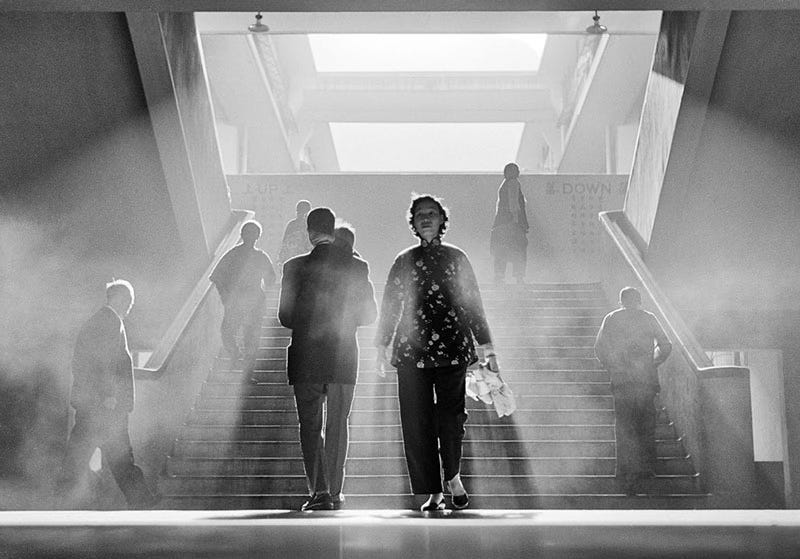
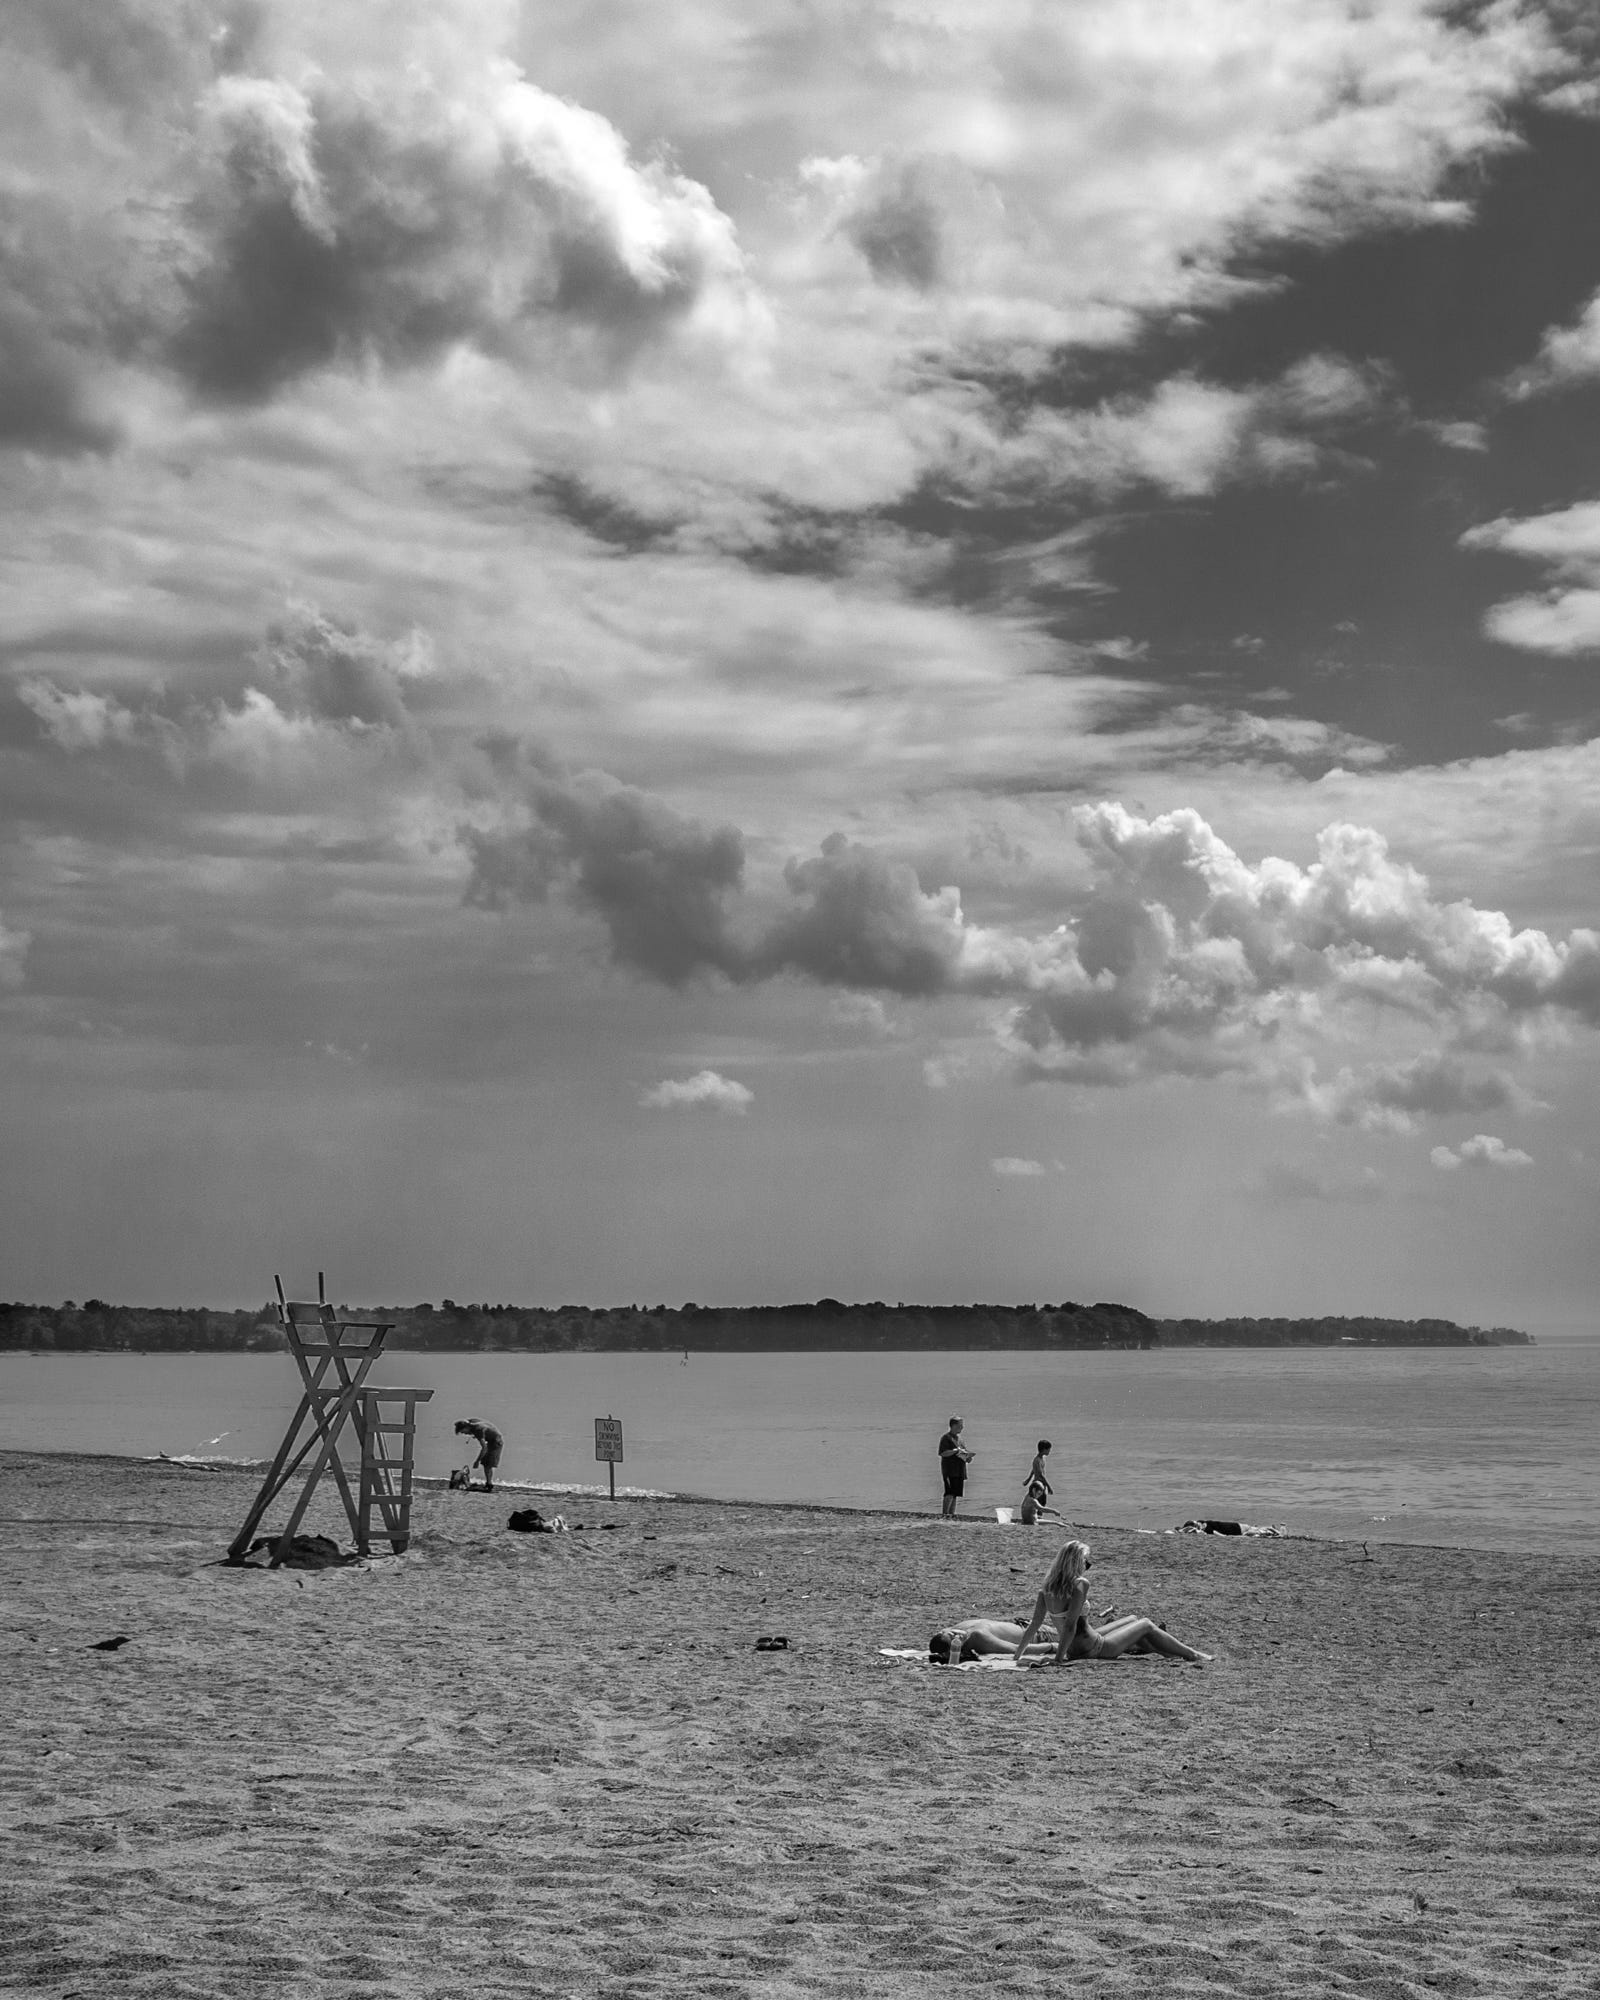
Circular Polarizer — ©Anthony Morganti Expose for Highlights: Don’t blow out your image by trying to brighten every shadow. In harsh sun, it’s often better to slightly underexpose (use negative exposure compensation) to protect your highlights from clipping pure white. You can always brighten shadows in post-processing if needed (mainly if you shoot RAW for latitude). Many famous street photographs were taken at high noon with deep black shadows – the photographers exposed for the bright areas, letting much of the scene fall to near-black. Embrace that look! You’ll get punchy, high-contrast shots that can feel bold. Your camera’s dynamic range might surprise you in how much detail it can recover from shadows, but even if the shadows go pure black, it can create a striking graphic effect.
©Fan Ho Embrace the Contrast: Instead of fighting midday light, use it. Intense sun gives defined, hard-edged shadows that can add drama or pattern to your compositions. Look for interesting shadow shapes or textures (the lattice of a fence, the silhouette of your subject on the ground) and incorporate them creatively. Photographer Cam Mackey, for example, often leans into harsh noon sun for fashion portraits, producing gritty shots with tons of impact. The takeaway: use noon light for what it’s good at – stark, graphic, energetic photos – rather than treating it as a liability.


Overcast Skies (Flat and Gloomy)
Cloudy days bring flat, diffused light. It’s soft and even, which is excellent, but it can also make images feel a bit dull or low-contrast. Here’s how to add punch under gray skies:
Bring a Reflector or Small Flash: When the sky is a giant softbox, your subject will be evenly lit but probably lacking sparkle. A reflector is your best friend now. Even under overcast heavens, there can be some directional light (the brightest part of the sky). Position a silver/white reflector to bounce a little of that light back onto your subject’s face from below or the side – it fills subtle shadows and adds life to their eyes. I love this trick because it keeps the gentle mood of diffused daylight but adds dimensionality. If you don’t have a reflector, a quick pop of fill from a speedlight (dialed way down or diffused through an umbrella) can also do the job – just a kiss of light to highlight cheekbones or make colors pop. The key is subtlety: you’re not overpowering the ambient light, just supplementing it.
Punch Up the Colors: Under a gray sky, scenes can look desaturated and bland. To counteract that, seek out color. Find a subject with vibrant natural color – a red jacket, a field of flowers, a graffiti mural, etc. – something that stands out against the muted environment. This injects visual interest into an otherwise monotone scene. Many landscape photographers on overcast days will focus on lush greenery or wildflowers, knowing those colors render richly when the sunlight isn’t washing them out. You can also introduce your own color: have your model wear a bold outfit or use a colorful prop. Overcast light won’t create harsh shadows on these colors, so they’ll come through nicely. (Bonus tip: consider adjusting your white balance warmer to offset the cool tint of clouds – a slight warming can make skin tones healthier and scenes more inviting.)
Long Exposure Magic: One advantage of overcast daylight is that the overall brightness is lower than full sun, which sometimes lets you experiment with slower shutter speeds. If you have an ND filter in your kit, try a long exposure shot to turn a “boring” scene into something dynamic. For instance, put your camera on a tripod and do a 5-10 second exposure of an overcast seascape: the waves and clouds will blur into a misty, smooth texture while static elements (rocks, piers) stay sharp, giving an ethereal look. Even a breezy day in the city, you could blur pedestrians into ghostly streaks. Using a 6-stop or 10-stop ND in daytime overcast can yield creative results that make the viewer forget the light was flat. This trick of adding motion can transform a dull setting – water turns to silk, crowds to mist – injecting mood and uniqueness into your shot. It’s a great tactic to experiment with when midday clouds make everything else uninspiring.
Shoot Small & Close: If grand landscapes look blah under gray clouds, switch to more intimate subjects. Overcast conditions are perfect for macro and detail photography. The soft light means you won’t get harsh micro-shadows on your close-up subject. Flowers, insects, texture details, and portraits of hands or eyes – all benefit from cloud-diffused light that reveals true colors and fine details. For example, a vibrant flower will show its saturated petals without bright sun, causing shiny highlights. You also won’t have to worry about super high contrast across a tiny scene, so your camera can capture all the detail. Many macro photographers prefer a lightly overcast sky or will create shade to mimic it, because it’s like having a significant soft light source from every angle. So take advantage: get in close, and let the overcast sky give you flawless, shadow-free lighting for those shots.
Consider Black & White: If colors aren’t working and everything is one big gray wash, try flipping to monochrome. High-contrast black and white images can save a scene that lacks color interest. For instance, a cloudy sky over a city might look dreary in color, but in B&W, you can amp up the contrast and grain, and suddenly it’s moody and compelling. Look for textures and shapes – the patterns of clouds or the silhouette of trees – and compose for those elements. Converting to black and white also lets you be aggressive with contrast in post-processing without worrying about odd color shifts. Crank the clarity, deepen the blacks, brighten the whites – you can create drama out of flat lighting.
Cluttered Environments (Busy Backgrounds & Mixed Light)
Shooting in a messy or chaotic environment – whether it’s a cluttered room, a busy street, or a forest with patchy light – presents two main challenges: distracting backgrounds and often irregular lighting (different light sources or objects blocking light). Professionals handle this by isolating their subject and controlling what the viewer sees:
Change Your Perspective: An immediate trick to eliminate background clutter is to recompose. Try shooting from above your subject so that the ground (or a clean floor) becomes the backdrop instead of the messy room behind them. For example, stand on a chair and shoot downward – you might crop out all the furniture and random objects, leaving just your subject against a neutral floor. Similarly, you can shoot from a low angle upwards if the ceiling or sky is clear. Or zoom in and get closer to fill the frame with your subject’s face or body, leaving no room for background distractions. By adjusting your angle and framing, you can often cut 90% of the clutter out of the shot without moving a single object. It’s a quick fix: if something ugly is in your frame, move yourself or zoom until it’s gone.
Use Lens Aperture to Blur: When you can’t avoid some background mess, hide it with depth of field. Switch to a wide-aperture lens (like an f/1.8 or f/2.8 prime) or use your longest telephoto and shoot wide open. A shallow depth of field will throw the background into a creamy blur, turning jumbled shapes and colors into a soft backdrop. The viewer’s eye will go straight to the sharp subject. For instance, a portrait at f/2 will render that cluttered bookshelf behind your subject as an indistinct haze of color. Even outdoors, a telephoto at a large aperture can blur people or cars milling about behind your main subject. This is where your gear matters: a lens capable of f/1.4 or f/2 can virtually erase a busy environment. If you only have a kit lens at f/5.6, try stepping farther from the subject and zooming in – increasing subject-background distance also helps blur the background.
Light the Subject, Not the Background: Professionals often deliberately darken or blow out a messy environment using lighting techniques. One method is to overpower ambient light with flash. For example, if you’re shooting a portrait in a room full of clutter, you can expose for a darker overall scene (fast shutter, low ISO, smaller aperture) and then use a flash or strobe to brightly illuminate your subject. The background will record much darker (even black) while your subject is correctly lit, effectively hiding the clutter in shadows. Photographer Peter Phun demonstrated this by photographing athletes at high noon on a street – he set his camera to expose the sunlit background about two stops under, then blasted the subjects with flash at f/16. The result looked like they were in a studio with a black backdrop, even though a busy street and gym equipment were behind them, because none of that got enough light to show up. You can do a smaller-scale version: put your subject near a window or lamp and let the background stay in a darker part of the room. Expose for your subject’s face, and let the cluttered background fall into darkness. The inverse scenario works too: place your subject against a bright window and expose for their face, intentionally allowing the bright background to blow out to white. This high-key technique can wash out all the chaos behind them in a pleasing glow. Either way, you’re using light to control what’s visible – lighting what you care about, and not lighting what you don’t.
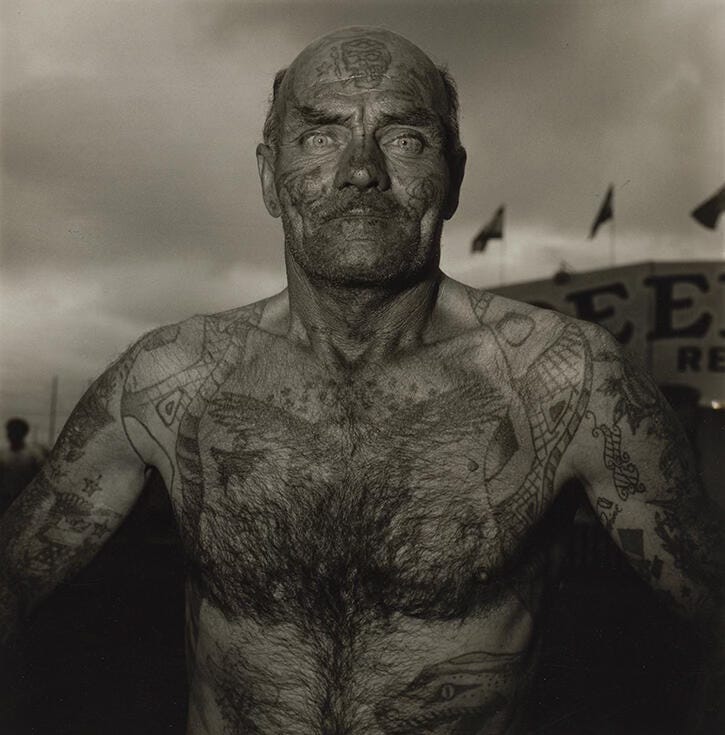
©Diane Arbus Clean Up (If You Can): It sounds obvious, but if you have the option, declutter the space before shooting (or mid-shoot). Take a “safe” shot first, then quickly move any distracting items that are easy to shift – cups, bags, stray garbage – out of the frame. You’d be surprised how much impact moving a single bright object can have. If a whole piece of furniture or a wall poster is ruining the shot, consider temporarily adjusting it. Photographers on location do this all the time: they’ll hide a trash can, straighten a crooked curtain, or ask an assistant to hold a plant out of the way. In a home setting, don’t hesitate to slide that pile of laundry over or take magnets off the fridge if they’re visible. One pro family photographer, who goes by her first name only, Audrey, noted she sometimes even takes pictures off the wall or moves a couch when shooting in clients’ homes – whatever it takes for a clean background. Just remember to put everything back! If physically moving things isn’t possible (say you’re in a street or event), you can mentally declutter by choosing what not to include. Frame your shot tightly so only your subject (and maybe one or two context elements) are in view, and everything else is cropped out.
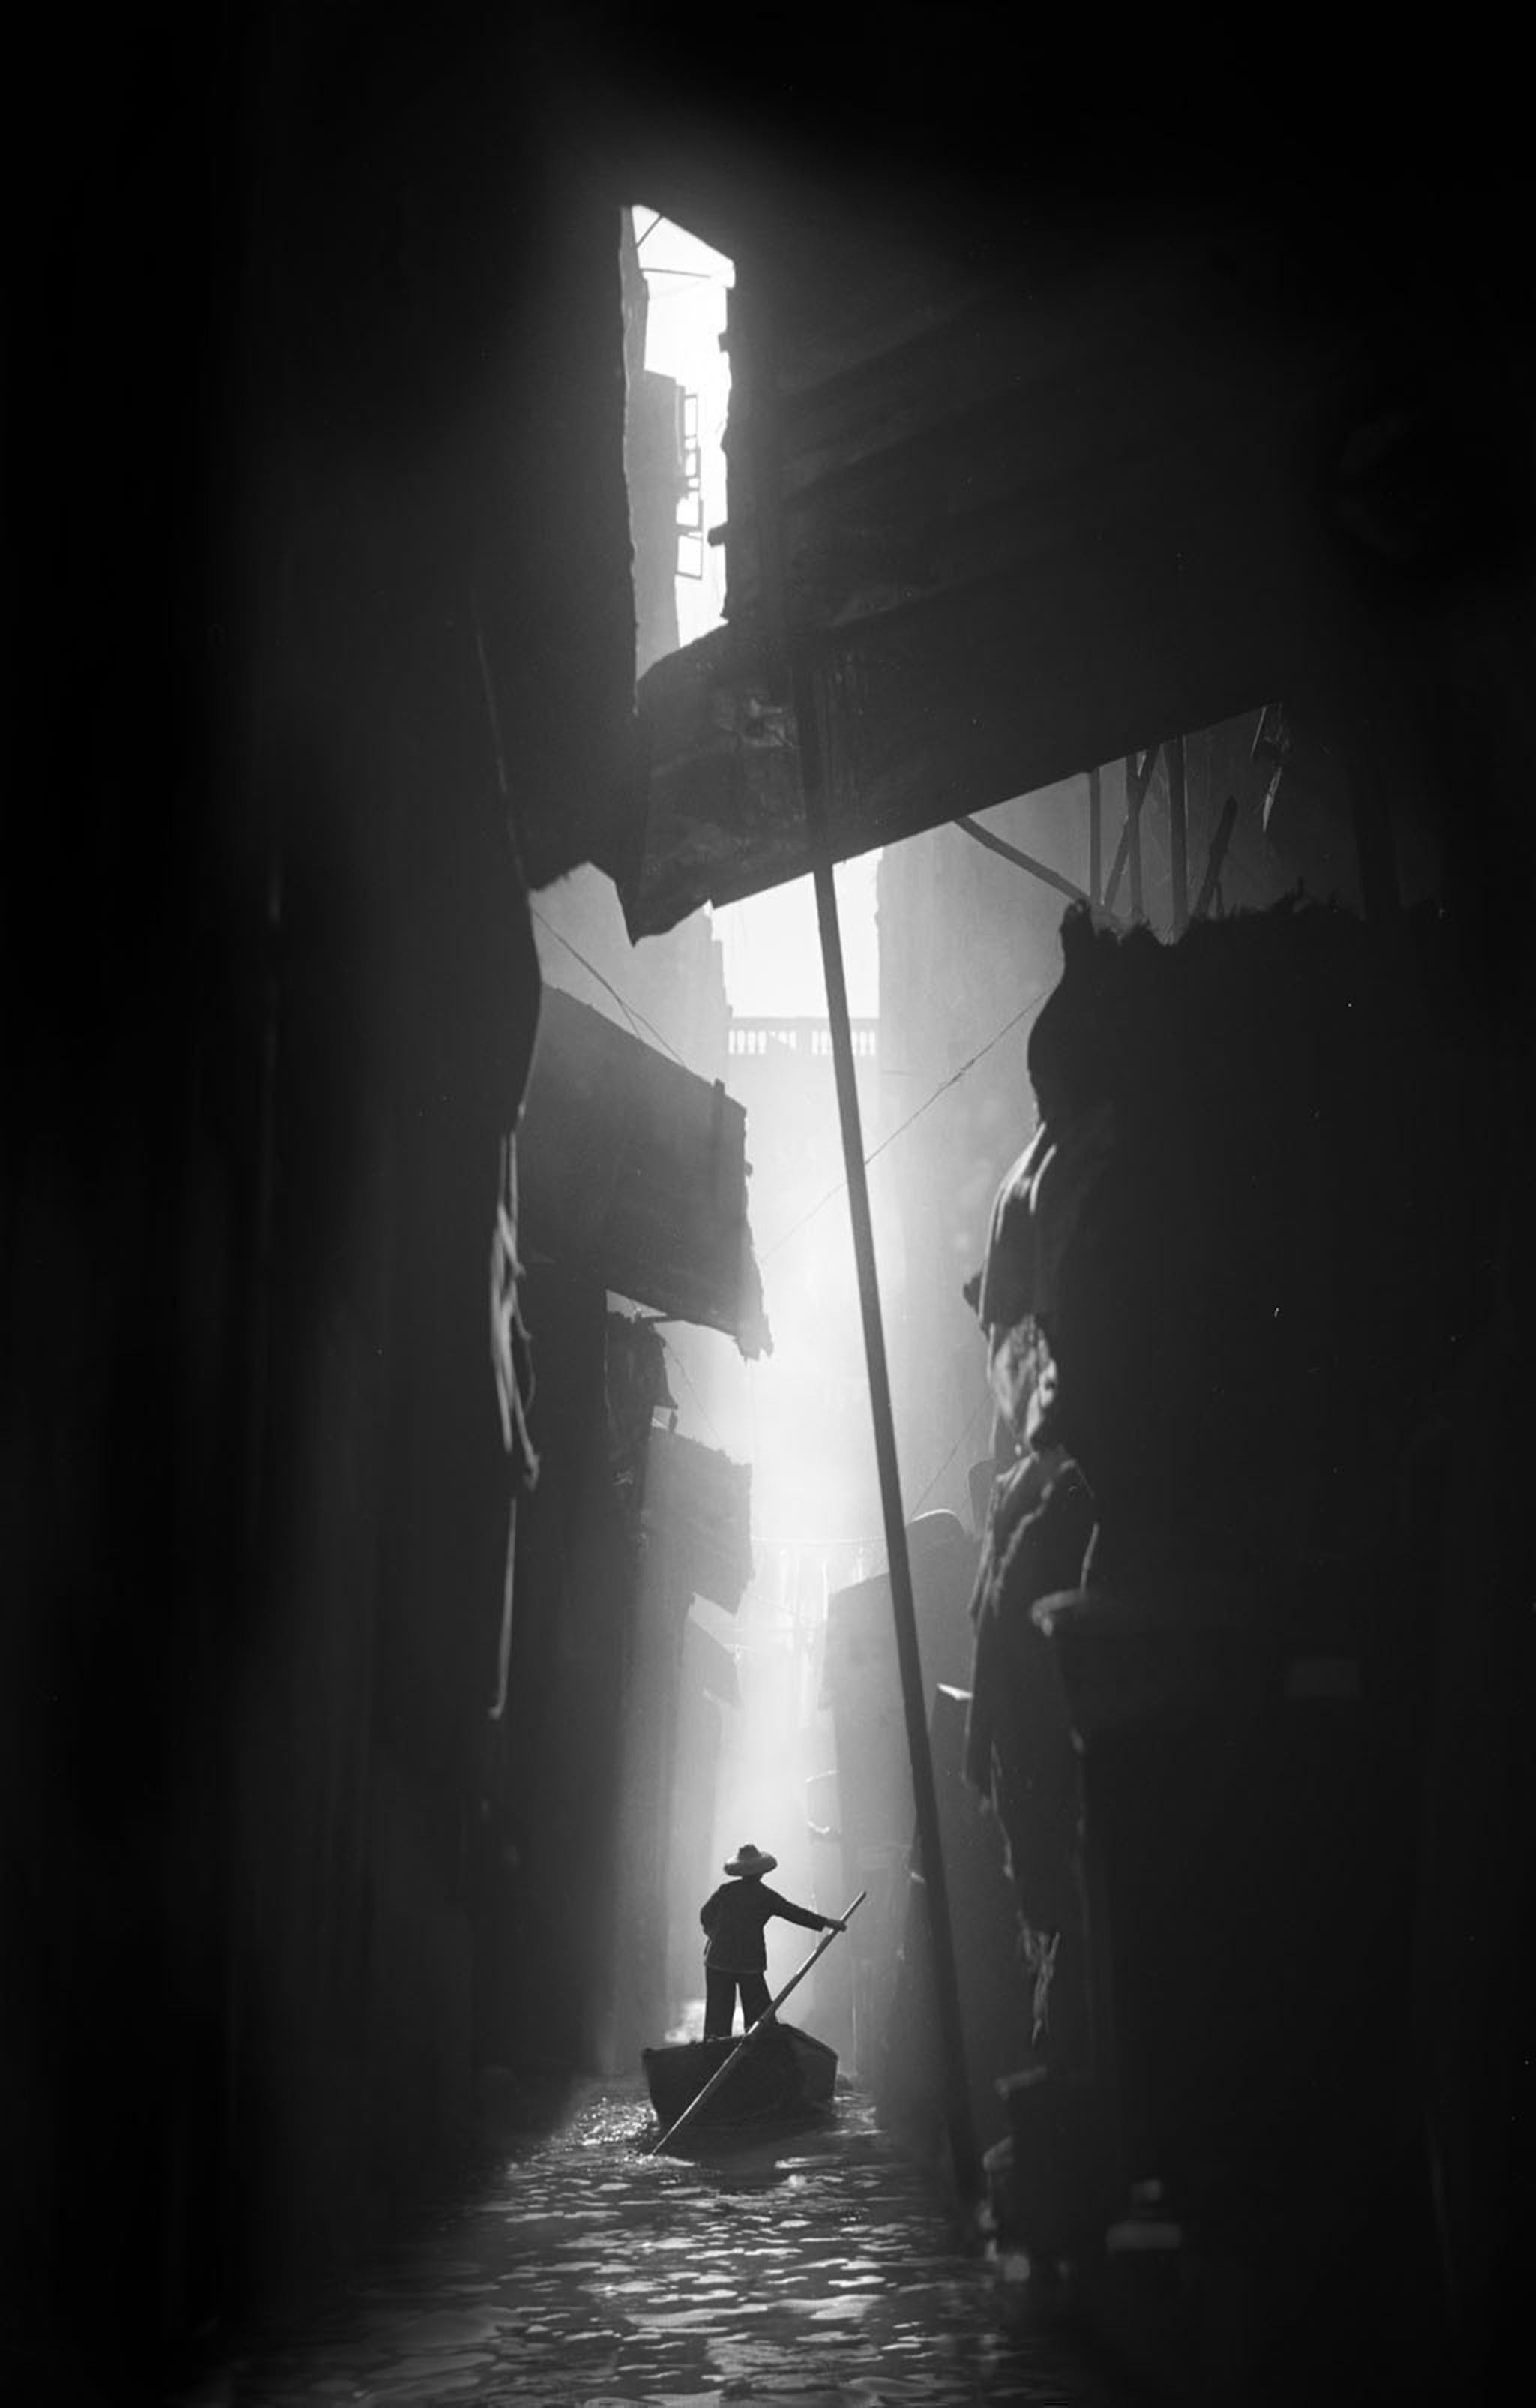
Exploit Pockets of Nice Light: In a cluttered environment, not every spot is equally ugly. Scan for any area where light is falling nicely – for example, a beam of sunlight coming through a window onto a plain wall, or an area under a streetlamp at night. Position your subject in that good light, and compose so that the light falls on them and the background is either completely light (blown out) or completely dark. This trick leverages the fact that viewers’ eyes go to the brightest part of a photo first. If you place your model in a golden shaft of light amidst a dim chaotic room, the bright illumination on them will naturally draw focus, and the mess behind them will fade into the dark. Conversely, putting them in front of a brightly lit blank wall or sky will make all the clutter in the shadows around them less noticeable. You’re essentially using selective lighting to direct attention. It can make a mundane location look almost magical if you catch the one pretty sliver of light. So before you write off a cluttered scene, walk around and literally see where the light falls. Often, the best photo is waiting in that one spot where the light and composition align just right.

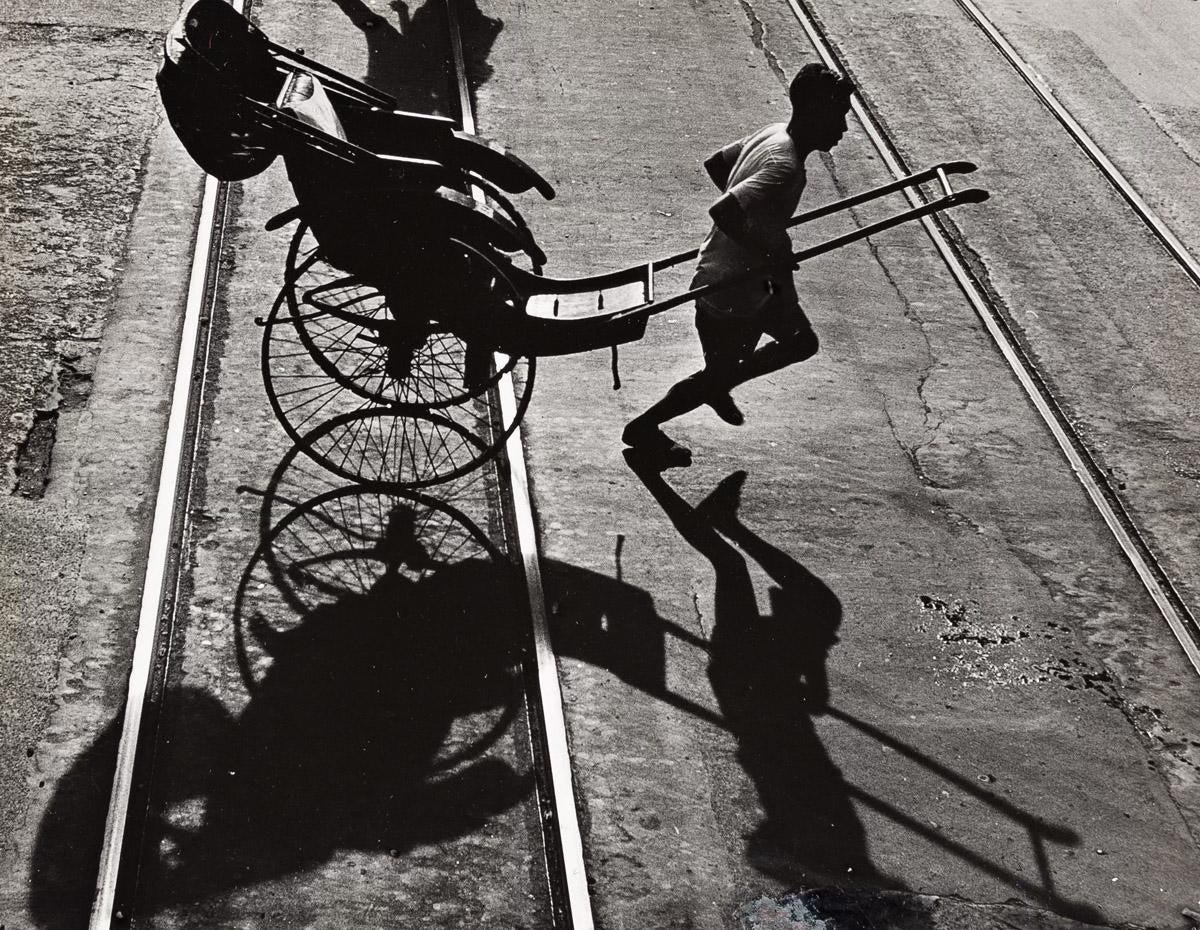
©Fan Ho

Harsh or uneven lighting and busy scenes are challenges, not deal-breakers. With the proper techniques (and a few handy accessories), you can create great images in conditions most people would avoid. The pros adapt by bending the light (with modifiers, flash, filters) and composing carefully, rather than only shooting at sunrise or in perfect studios. By embracing these strategies, you’ll find there’s no such thing as “bad” light – just different light to create with. So next time you’re faced with a blinding noon sun, a drab sky, or a chaotic background, remember these tips, grab your camera, and shoot with confidence!
Thank you for reading. I hope your weekend has been grand!
great tips, I've got a polariser and an ND, so will give it a go, PS the 2.8 thing with aperture ONLY applies to digital 135 slr's, Medium format (Hasselblads) live at 2.8/2.2! thats their 'wide open' and LF is at 5.6 or 8! and then scheimpflug can take over, and create a selective focus, a Tilt shift lens on the others works as well; but! a tip, the wider you go with lens selection (or up a format) the more flare will come biting like a crocodile!, so stay away from wide open at noon, I've used hasselblads in EV 16/17 light with 3x ND's (asa 100/200!) @ f11\1/250th OR f16@1/500th to keep glare to a minimum, it WORKS fine, I've still got highlights, just not eye blinding ones.
Love that last Fan Ho shot!